Monday 29 May 2017

A Nine Years' War AAR - playtesting my Sharp Practice mods

I mentioned a few posts ago that I had been developing some modifications to Sharp Practice so that I could fight large scale battles using my NYW armies, which were based up for FOG:R rules.

Last Sunday at the club I had the chance to play through a battle using these mods, the idea being to playtest what I'd written and see where I needed to tweak them to make them more playable. So, many thanks to Clive, who took the role of the Anglo-Dutch commander. I commanded the French.

The battlefield was relatively open, giving the opportunity to manoeuvre the troops more easily.


The Anglo-Dutch arrived first, with a brigade containing dragoons heading towards the French left.


French troops, also containing dragoons quickly deployed to counter them.


Note the Dutch Garde Te Voet, with their regimental gun.


On the right, regiments of Horse began to advance, with Woods' Horse (green standard) receiving fire from the Fimarcon Dragoons.


Elsewhere the Régiment de Villeroy charges the Dutch Nassau Horse in column. Over here on the French right flank, the Horse continue to advance until stopped by accurate Anglo-Scottish musketry.


Woods Horse charge the French Dragoons, wiping them out.


The French camp is a mere canter away now.


The Anglo-Scottish Brigade arrives, supported by guns and Fusiliers.


Woods' Horse attack the French camp but are beaten off by musket fire from the Fusiliers du Roi.


This allows the main body of the French army to deploy, including the Gardes Françaises and the Régiment du Roi, both resplendent in blue uniforms.


Woods' Horse are powerless and take casualties from short-range musketry.


Lumley's Horse advance, supported by the Garde Te Voet


The Anglo-Dutch Horse are in the thick of it as the Régiment de Navarre are in combat against the Earl of Oxford's Horse


However, as the Régiment de Rohan reinforce the French left, threatening to charge the English dragoons a stalemate develops.


The battlefield is becoming congested but the French centre looks strong.


Eventually, we had to call it a day as we ran out of time.

So, an inconclusive result, which is kind of appropriate for the period. Many battles ended up with neither side having the upper hand, which is why there were so many sieges and a lot of fruitless marching and counter-marching to try and gain an advantage.

Some notes about the playtesting. Firstly, it was great to have the chance to see how my ideas worked out in an actual battle. Early on, it became apparent that my initial ideas gave the Horse far too many advantages in Fisticuffs, so I amended them as the game progressed, which evened things out a lot. We also agreed that the standard rules for artillery in SP made the guns far too powerful, so we agreed to halve the number of dice rolled for each gun. This gave a much better result.

We also decided that troops formed up in column should be allowed a D6+3 move, rather than a simple D6, but that they would only be allowed to use the front two bases in Fisticuffs.

I think that we will need to play through these amendments again, but overall, these changes do seem to make for a fairly reasonable game with large armies that look attractive on the table.

Tuesday 23 May 2017

The Encounter at Splotz - a Sharp Practice AAR

 This AAR covers a battle fought using Sharp Practice rules at the club recently. I commanded the Syldavians while Kev led the Bordurians. The battle was fought using my 15mm 18th century armies.

During the War of Sinjenk's Nose, the village of Splotz, in the Syldavian province of Polishov was the site of more than one engagement between the Syldavians and their Bordurian enemies. This battle was an early encounter between the advance guards of the main armies.

Here is the village from the east, showing where the Syldavians will enter from.


The environs of the village itself would be the scene for most of the fighting.


The Bordurians deployed first, with light infantry taking advantage of a Moveable Deployment Point to swiftly occupy the village itself. This would give them an advantage which left the gallant Syldavians at a disadvantage for the whole battle. With two units of light infantry in the manor house and the farm (jägers and haiduks, the Bordurian term for grenzers), they would prove to be a tough nut for the Syldavians to try and crack.


Soon the Syldavians appeared on the scene, with light troops advancing between two hills towards the village, acting as a shield for the main body of fusiliers and grenadiers. A unit of dragoons, acting as Impact Horse guarded the left flank of the jägers. Bordurian lancers also arrived and began to advance upon the Syldavian right flank.


To the north of the village, the remaining Bordurian infantry began to advance to cover the open fields. At this point in the proceedings there was no sign of the Bordurian commander, who was presumably still enjoying a leisurely breakfast in a local inn.

Unwisely, the Syldavians decided to send their dragoons across to their left flank in an attempt to counter the Bordurian right. These would fall foul of concentrated musketry which effectively neutralised them for the rest of the battle.


The Syldavian jägers assaulted the haiduks in the farm but came under fire from the Bordurian jäger skirmishers inside the manor house, causing shock. They did manage to temporarily force the haiduks back from the wall but were unable to capitalise on this and were soon forced to withdraw themselves and were only rallied by the presence of a priest who was in the commander's entourage.
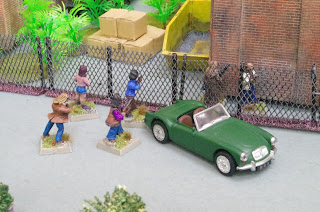

The main Syldavian line redeployed to receive the charge of the lancers who were totally wiped out. Unfortunately, in the fisticuffs they took a number of casualties. The grenadiers advanced around the church in an attempt to support the dragoons who were losing men and taking on shock. A Charge Them To Hell random event led them to make a rash assault on the Bordurian line, which led to them losing many men and breaking them.


A heavy pall of smoke descended on the battlefield which hid the fleeing grenadiers from the view of the jeering Bordurian fusiliers. The smoke also allowed the dragoons to make a much more orderly withdrawal.


With more Bordurian jägers entering the village, the Syldavian fusiliers were unable to advance effectively in that direction and they therefore took the decision to move to their left in an attempt to sweep around to the north of the village. While doing this they took shock and casualties from some very effective fire from the experienced Bordurian light infantry. At the same time, the jubilant Bordurian fusiliers also advanced across the open fields. By the time that the Syldavians had deployed on the left-hand hill the Bordurians were ready, loaded and presented. Both sides engaged in a series of exchanges of musketry, with the Syldavians coming off worst.

The Syldavian commander, his forces becoming low on morale decided that caution was the better part of valour and withdrew westwards from the field of battle, leaving the hated enemy in control of the unhappy village of Splotz.

So, a pretty terrible day for the Syldavians, who it has to be said took the wrong option when they advanced their main force towards the village through the wooded gap between two hills. This effectively created a bottleneck that would prevent them from having any space to manoeuvre. I think also that taking a unit of impact cavalry was a waste of time. I would have been better off with a second unit of light infantry. 

Anyway, well done to Kev, who had the better plan and the upper hand right from the start. For me, there is always next time.

Saturday 20 May 2017

Possible Infantry for VBCW.

A few days ago, I posted about the Tabletop Sale at the club, ending the post with a picture of the odds and ends that I picked up.

So far, I've only assembled the plastic figures and undercoated them, because I have been working on the ten metal ones, the Renegade Miniatures WW1 Scottish infantry.

As I wrote previously, I don't intend them to be used as WW1 Scots at all. My idea is to use them for VBCW and other games, such as Call of Cthulhu and 7TV.


To make them look a bit more not-Scottish, I decided to give them green bands on their Glengarry bonnets, but apart from that, they have been given fairly standard-looking uniforms and equipment. As well as the green trim on the Glengarries, I've also given the troops green shoulder tabs. The squad leader actually has a slightly different appearance to the rest of the squad, his bonnet is of a more formal style, with a cap badge and longer tails, so, I painted it completely green. I've also given him green and yellow collar tabs. I intend these to look like rank markings, rather than just give him standard stripes on the arms of his service tunic. After all, this is some faction's private army, not a squad of regulars.

Anyway, I think that they have come up rather nicely and I might have to think about some more senior chaps and maybe a Lewis Gun team, but these will do for now.

Wednesday 17 May 2017

Table-top Sale at the club

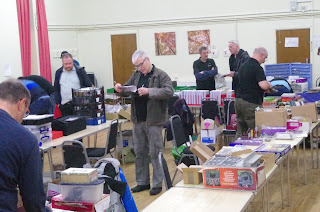
A couple of Sundays ago the club held its annual Table-top Sale. The event was reasonably well-attended and there were plenty of bargains for sale.


We started setting up at around 8am and before long people were already taking notes and checking out what others were selling.


There were all sorts of things on sale, from ready-painted armies to board games and sets of rules.


After the sale was over, some of us played a Living on the Frontline participation game, using the Winter of '79 skirmish rules but with a decidedly weird twist. It certainly put a whole new gloss on the phrase "Leafy Suburbs".


The basic premise was that the local council had declared a state of emergency and ordered everyone to leave town. Unexplained outcrops of jungle were springing up in unusual places. A few groups of stragglers, happily armed to the teeth were stuck inside the town and had to make their way to a helicopter on top of one of the buildings to escape.

Before long, it became obvious that getting near the foliage was Not A Good Idea.


Not only was it a Bad Idea, but the patches of greenery began to spread rapidly. Where was Monty Don when you needed him most?


Before long, things were getting decidedly unpleasant. You don't get problems like this on Gardeners' Question Time.


My gang made it as far as the outside of the building where the helicopter was waiting, but it was really too late.


I've never seen one of these at my local garden centre!


In the end, young James managed to get one of his squaddies into the chopper and he made his escape, leaving the rest of his troops to the less-than-tender mercies of a horde of overgrown Venus flytraps, a fate shared by the rest of us.

So, thanks to Clive for a most entertaining game. You can see more pictures of his excellent carnivorous plants here.

Anyway, I am sure people are wondering if I bought anything at the sale myself. Well, I did, but not a huge amount, mainly because I forgot to stop off at an ATM in the morning.


I bought a couple of sprues of Deus Vult foot sergeants to make up as Frostgrave warbands, a Mordheim sprue for the same purpose and 10 rather nice 28mm metal figures by, I think Renegade. These are early Great War Scottish infantry in Glengarry bonnets, but I shall be painting them up in a more generic colour scheme to use in VBCW and other similar scenarios.

Monday 15 May 2017

PSC 15mm Universal Carriers

These were released by the Plastic Soldier Company fairly recently and I took advantage of the pre-release offer to buy nine models for the price of six. So, now I have nine Universal Carriers to make and paint. The Universal Carrier was produced in huge numbers and in several variants other than the basic Bren Carrier.

I started on a group of four with Vickers MMGs, which will work well with my 1944-45 British Rifle Company as a machine gun platoon for IABSM The remaining five will be made up as four standard carriers and one Wasp carrier, with a flamethrower. This will give me a three vehicle recce section and a carrier to act as an HQ vehicle, plus some scary support.

I will also be able to pick single carriers for use as support options in my 15mm Chain of Command project.

Anyway, here are the ones I've painted so far;


I've made them look pretty muddy, deliberately, because I rather like a weathered appearance to my vehicles.

They are pretty easy to put together, as are most PSC models and the sprues contain lots of options, so that you can make the basic carrier, two different flamethrower variants, an armoured observation post, a carrier with a 3" mortar (the mortar was stowed and had to be dismounted for action), machine gun versions with either the Vickers or a Browning 50 cal MG or a carrier equipped with a 2" mortar, which could be fired from the vehicle itself. So, lots of options, I think. 

This is a terrific addition to the PSC range of British and Commonwealth vehicles and is bound to end up in a lot of armies. With a change of figures, they would also be suitable for North Africa, because only NW European battledress ones are supplied with the kit.


Thursday 4 May 2017

The Nine Years' War in 15mm

Going back about three years, I had an interest in the Field of Glory rules for the Renaissance and later Pike and Shot period. I was also very taken with the very nice figures produced by Lurkio in 15mm for the latter part of the 17th century.

I bought a couple of complete armies, which I augmented with some extra foot regiments. The figures really are very nice and paint up well.

Unfortunately, I never much liked the FOG:R rules and the armies currently languish in their drawers. I thought that it was worth posting some photos, though.

First, here are the French forces of Louis XIV;


These are the elite troops of the French army, the foot of the Gardes Françaises and the horse of the Régiment du Roi, with a base representing the army commander-in-chief.

Next, here are the line regiments of Foot;


The upper photo shows the Régiment de Champagne and the Régiment de Navarre. The lower one has the Picardie, Languedoc and Lyonnais regiments.

Next, the French line Horse, represented by this brigade, comprising the Régiment de La Ferronnay (red cuffs), the Régiment de Villeroy (grey cuffs) and the Régiment de Rohan;


And the artillery, accompanied by the Fusiliers du Roi and the Fimarcon Dragoon regiment;


My other army is an Anglo-Dutch one, representing the forces of William III in the Low Countries. This was a multi-national force, with English, Scottish, Dutch and Danish regiments fighting as part of the Alliance of the League of Augsburg.

First, here is an Anglo-Dutch brigade of Horse. These are Lumley's Horse (red coats/yellow facings), Woods' Horse (red coats/green facings) and the Nassau Horse (grey coats/orange-red facings)


A combined Dutch and Danish brigade of Foot. Note that the Danish Foot regiments do not contain any pikemen. They are (front to rear) the Danish Prins Georg (orange facings) and Fynske (green facings) regiments and the Dutch Garde Te Voet (aka the Blue Guards)


An Anglo-Scottish Foot brigade, supported by artillery. These are the First Foot Guards (front right, blue facings with regimental gun), 1st Regiment of Foot a.k.a. The Royal Scots (front left, white facings with regimental gun) and The Queen Dowager's Regiment of Foot (rear, green facings. They are led by a general.


And finally, some English Fusiliers, the Earl of Oxford's Horse and some English Dragoons.